Creating a moving look or a set of looks that play one after the other is covered in this section. This section will give instructions on how to program a sequence button to play a sequence of looks.
The first step we need to take when creating looks without the Sequence Wizard is to go to the Programming Mode Screen and press the Clear All Button. This clears all Sequences running and gives us a clear slate to create our new look. Advanced users may use the New Sequence Button( which will start a new playback and leave all current playbacks running), and not press Clear All to start a new playback to record to, and follow the same next steps bellow.
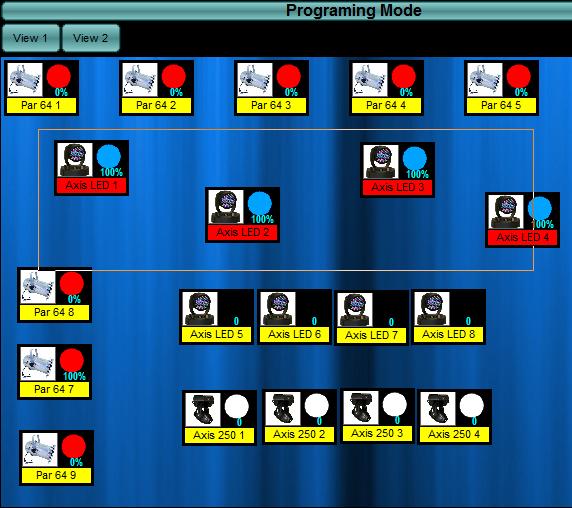
Next we will need to select the fixture we are going to use in this sequence. Using the Fixture Layout window, select all the fixtures needed. Use the rubber band and control keys to select more than one fixture, holding the control or 'Ctrl' button down while selecting fixtures selects more than on at a time. To clear selected fixtures click anywhere on the Fixture Layout Window. The Fixture Layout window is shown below.
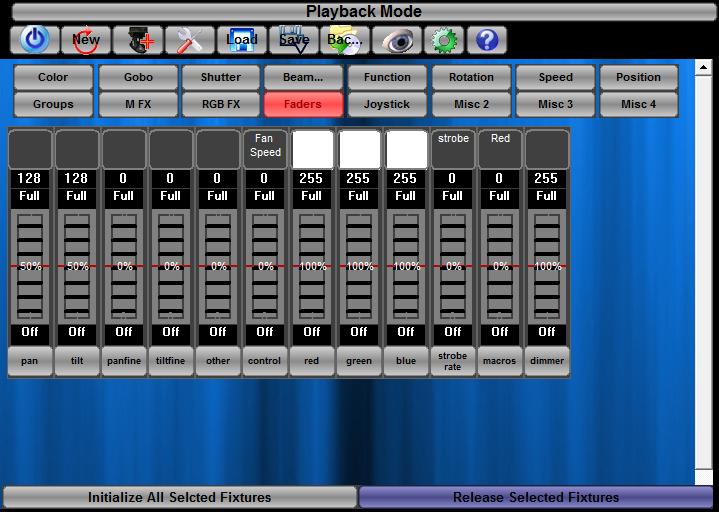
Now we need to initialize the selected fixture by pressing 'the initialize selected fixtures' button. If the fixtures do not completely initialize - the shutter opens, the lamp is at full and the fixture is pointing down - use the faders preset tab to adjust the channels needed to initialize the fixture.
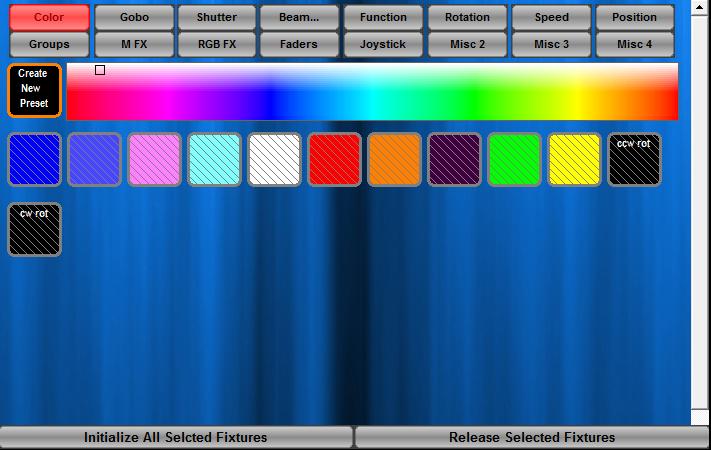
5. Once all the fixtures are initialized, all other properties can be adjusted. Set all the channels/properties to the look you would like. This could entail selecting only odd fixtures and changing them one color while event fixtures can be another color. This applies for all types of channels. Below is the Preset palettes window, we can use this to alter any channel or property of the fixture we are trying to set a look or step for. Just click through all the buttons like, Color, Gobo, Shutter... etc. The Faders tab can also be helpful for full control of all the lights channels.
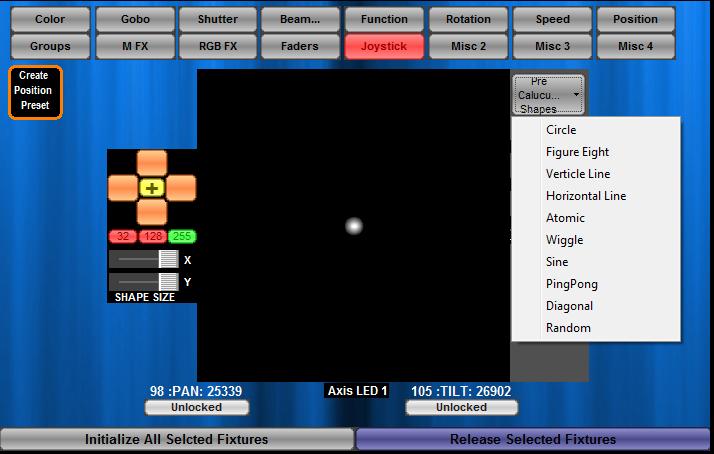
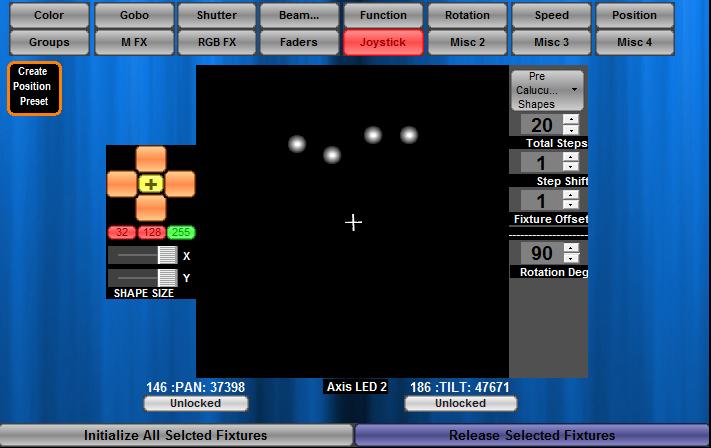
Next we can select the shape to apply to the selected fixtures. Use the drop down box shown below to select the shape.
Once the shape has been selected the shape size, offset (Step Shift) , Fixture Offset, and Total steps can be adjusted. If we are applying different shapes to different fixtures the number of steps must stay the same for all fixtures. If we were to select circle, as shown below, all the selected fixtures would move in a circle movement, creating a sequence of 20 steps.
The shape can be moved by right clicking on the Plus cross in the center. This will move the shape's center to the desired position. Sizing and offset can be adjusted from the Shape Size Sliders and the Step Shift, Fixture Offset Selector. We can also review and playback the sequence and make sure we are satisfied with the looks. On the Playback Control Press the stop button, then press the play button and confirm you are happy with the result. If any changes need to be made we must use the forward and reverse buttons to navigate through the steps, and the "record Over Step' button to after modifying the look or step. The Play, forward, reverse buttons are highlighted below. Timing for all steps can be changed by changing the Fade time slider while the sequence is playing back.
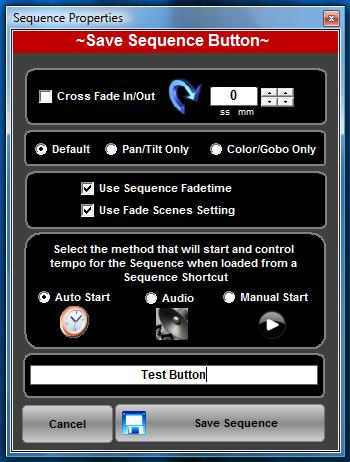
Once all changes have been made we can now save the sequence to a button ( Sequence Button) for recall later. Press the 'Save Sequence as Button' and the dialog below will appear.
We will now see the dialog below pop up in the center of the screen.
We can now name the sequence button and save it.
Other option available here are:
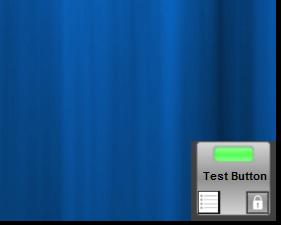
Cross Fade In/Out This will cause this button to fade in and out according to the time specified Default, Pan/Tilt Only, Color/Gobo Only These option allows you to save all channels, save only pan and tilt channels, or save only color/Gobo and all other channels except Pan and tilt. Use Sequence Fade time This option will force the sequence to playback at the programmed Fade times Use Fade Scenes Setting This will fade from step to step on channels that are selected as fade channels. Pan, Tilt, Dimmer are all automatically set to be fade channels. Auto Start This will start the sequence steps running as soon as the button is pressed Audio Causes the audio to control the speed at which the sequence fades. This can be set on the Sequence button at any time Manual Start Will force the user to press the play button on the playback to start the steps in the sequence. Once you have entered the name and set all desired parameters above, the screen will go to Playback mode and show the new button in the new button area on the bottom right of the screen. Move the button anywhere on the screen and depress it. Now the button we created can be recalled as a still look.