Once all
the fixtures have been loaded, you must address all fixtures in the DMX
chain, in this section we will describe the steps needed to address
each fixture.
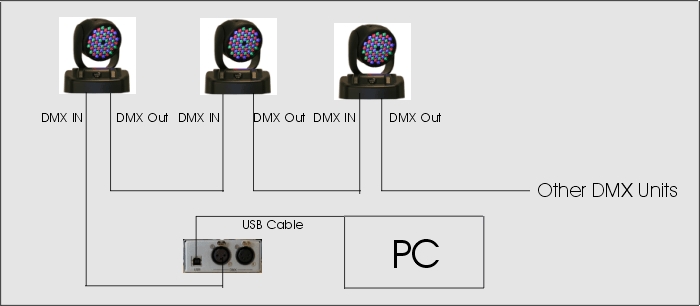
1. Make
sure you have hooked up all the fixtures from one to the other in a DMX
chain. The out connector from the USB to DMX interface will go to the
first fixture in the chain and then from one fixture to the next in a
In-Out manner. The illustration below shows the setup.
2. Once
the fixtures are connected to the DMX chain and the USB to DMX
interface is connected to the PC, we can set the address of each
fixture so that it can be controlled from Enlighten.
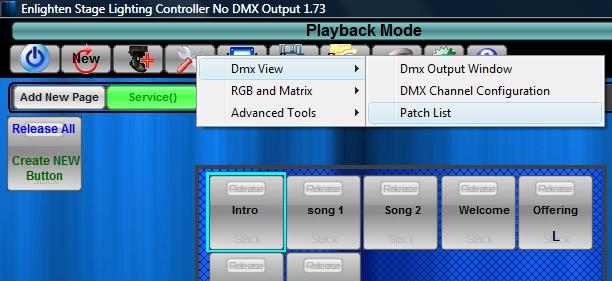
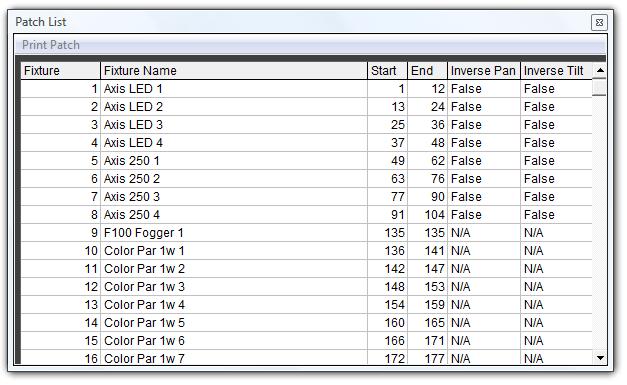
a. There
are two methods to showing the start address of each fixture. For
expert installers, click on the tools icon on the toolbar and select
patch list, this will show all start addresses for the fixtures loaded.
b. For
beginners, Follow the steps below.
3. On the
Enlighten interface go to the top of the screen and select 'Programming
Mode' Button. You should see a screen display similar to the one below.
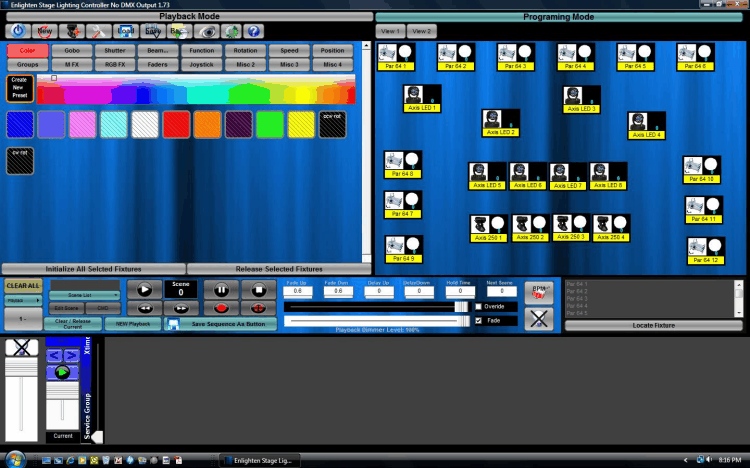
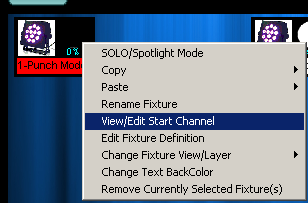
4. Right
Click on the first fixture you would like to set the address to and
select ' View/Edit Start Channel' from the menu options.
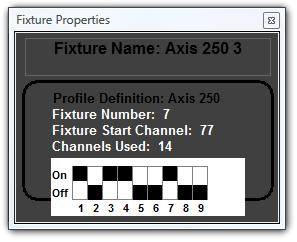
5. The pop
up window below will appear, showing you the Start channel and the dip
switch setting, if applicable, to the fixture selected.
6. Locate
the fixture in your room for that starting address and either set the
dip switch setting to the ones indicated on the pop up window above or
the start channel ( for fixtures with digital displays ) . Consult you
fixture instruction on how to do this.
7. Once
all the addresses are set you are ready to start creating you lights
buttons and presets.
